Setting Up a Jekyll Blog - Part 5
Dan Holloran • August 10, 2015
So now we have setup, tweaked, and styled our new Jekyll site. Now it is time for the whole world to see and admire our work, at least we hope they will. There is a large range of options in the Jekyll Documentation about Deployments but I am going to focus on Github Pages since it is extremely easy to get started. The one caveat is that Github rightfully so restricts you to a few plugins so if you need some more control you will need to move to a new hosting provider. Which moving a static site compared to a traditional CMS is relatively easier since everything is just a static file in a Git repository.
For the purpose of this post I am assuming you have at least some familiarity with Git. If not it should still be fairly easy but it may help to do a little reading about Git there are plenty of resources around the web.
Creating Your Github Pages Site
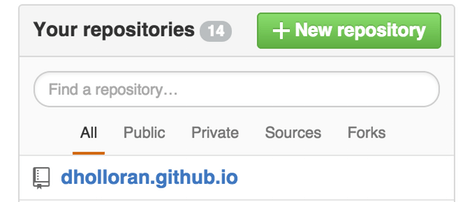
So the first thing you will need is a Github account if you do not already have one you can get one here. The next thing you will need to do once you have signed/signed up is to create a new repository that is {username}.github.io this will also be the URL you will access your site from.

While you are creating the repository you might as well add a Jekyll .gitignore and a license file. Github requires you to ignore the _sites directory since it will handle building that each time you push changes. Now you will either need to add the Github remote with git remote add origin https://github.com/user/{username}.github.io.git if you have been tracking your changes with Git already. If not you should run git init in the Jekyll directory then stage all of your files with git add .. After that you can add your initial commit git commit -m "Initial commit" then you can run git remote add origin https://github.com/user/{username}.github.io.git. From here on out every time you push something to your master branch with git push origin master Github Pages will build your site and then deploy it. Now you should be able to access you site at http://{username}.github.io/ it is usually pretty fast but give it a minute if it is not instantly up.
That was simple wasn't it?
This is actually all there really is to deploying a Jekyll site with Github Pages. Well at least if you are ok with accessing your site at http://{username}.github.io/ which changing that is extremely easy. You can either setup a subdomain or an apex domain you can find more information about the two here. The main benefit you get from a custom domain is access to the Github Pages Content Delivery Network and Denial Of Service attack mitigation. As well as you get to choose your own awesome domain name or be boring like me choose your name.
Adding A Custom Domain
To add a custom domain first you need to create a CNAME file to your repository the file should be all capitals and no extension. In this file all you need to add the name of your domain myawesomedomain.com do not include the http:// or www only the domain name. The you just need to commit and push the CNAME file to Github. You can confirm that the previous step was successful by going to your repository sidebar and choosing the settings page. In there under Github Pages you should see your domain name.
Then you need to go to your DNS provider and update the DNS information for your domain. If you are using a subdomain you can just add a CNAME record on your primary domain. If you are using an apex domain like me you will need to configure either an ALIAS, ANAME, or A record depending on your DNS provider. More information about setting up a custom domain name with Github pages here.
So there is much more you can do with Jekyll this has only scratched the surface. I hope to dive more into Jekyll plugins among other things. Which will force me to move to another host out side of Github Pages. However, the Github Pages is an excellent deal Git hosting, deployments, and hosting for free. You just give up access to continuous integration tasks, server configuration control and the ability to use custom Jekyll plugins. It is a great first step if you really want to give Jekyll the full chance it so greatly deserves.